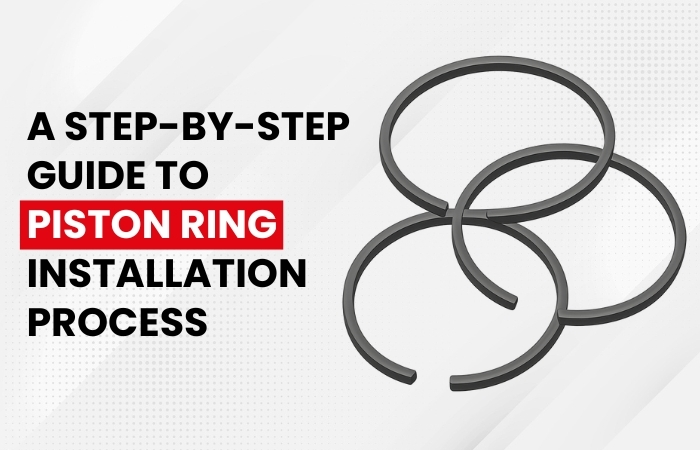
How does Piston Ring Installation Work?
Introduction: Importance of Proper Piston Ring Installation
Piston rings are a part of the engine that help it seal the combustion chamber by preventing gases from leaking into the crankcase, preserving cylinder pressure, and boosting engine efficiency.
Its proper installation is important for it to perform the task mentioned above. In this blog, I will provide you with a step-by-step guide on how the installation process of piston rings works, with the required tools and pre-installation checks.
What Are Piston Rings and Their Role in an Engine?
A piston ring is a metallic split ring that is between grooves on the outer diameter of a piston in an internal combustion engine or steam engine. It helps in sealing the combustion chamber by preventing gases from leaking into the crankcase and preserving cylinder pressure, and boosting engine efficiency.
The three main functions of the piston ring are:
- Sealing: It plays a vital role in maintaining an airtight seal between the piston and the cylinder wall, which prevents combustion gases from escaping through any gaps formed during the explosion stage.
- Heat Transfer: Piston rings act as a thermal bridge, transferring heat from the piston to the cylinder wall.
- Piston Alignment: Piston rings help in keeping the piston correctly aligned within the cylinder. If the piston were to tilt and scrape directly against the cylinder wall during movement, it could cause serious wear or damage.
For these different functions, there are different types of piston rings called compression rings, second rings, and oil control rings.
Tools and Equipment Required for Piston Ring Installation
To implement the piston rings installation properly, it is necessary to use the right piston ring material and tools to ensure accuracy, prevent damage, and achieve proper sealing inside the engine. Below are the essential tools and equipment required for the piston ring installation process:
1. Piston Ring Expander Tool
- It helps in expanding piston rings safely without overstretching or breaking them. A piston ring expander helps in placing the rings evenly into the piston grooves while maintaining their original tension.
2. Piston Ring Compressor
- A piston ring compressor helps in compressing the installed piston rings so the piston can be smoothly inserted into the cylinder bore. It ensures uniform pressure on all rings and prevents them from tearing the cylinder wall.
3. Clean Lint-Free Cloth and Solvent
- Clean Lint-Free Cloth is used for cleaning piston grooves, rings, and cylinder walls. It helps in removing dust, carbon deposits, and debris, ensuring the rings seat correctly and function efficiently.
4. Feeler Gauge
- A feeler gauge helps in measuring piston ring end gaps. Correct end gap clearance is critical to prevent ring binding, overheating, or loss of compression during engine operation.
5. Torque Wrench
- The torque wrench prevents uneven pressure that could damage piston components or affect ring alignment. It also ensures that the bolts and fasteners are tightened to the manufacturer’s specified torque values.
Pre-Installation Checks Before Installing Piston Rings
Before installing a piston ring, it is important to check these factors to prevent early ring failure and ensure long-term reliability:
1. Inspect the Cylinder Bore
- It is important to check if there are any scratches, wear, or uneven surfaces on the cylinder wall. A damaged or worn cylinder bore can prevent proper sealing and lead to blow-by or oil consumption.
2. Check Piston Ring Grooves
- Ensure that all the piston grooves are clean and free from carbon deposits or debris, as dirty or worn grooves can prevent the rings from seating correctly and reduce sealing efficiency.
3. Apply Proper Lubrication
- Proper lubrication helps reduce friction during installation and initial engine startup.
4. Measure Piston Ring End Gap
- Always check the piston ring end gap by placing the ring inside the cylinder bore. Use a feeler gauge to ensure the gap matches the manufacturer’s specifications. Incorrect end gaps can cause overheating or ring breakage.
5. Verify Ring Orientation
- Engines need 3 piston rings to function. It is important to check the markings on the rings to ensure proper orientation during installation.
6. Confirm Correct Ring Type and Size
- Always verify that the piston rings match the engine specifications, including diameter, thickness, and material. Using the wrong ring size or type can lead to piston ring failure.
Step-by-Step Piston Ring Installation Process
To ensure engine performance, sealing efficiency, and long-term durability, it is important to install piston rings properly. Follow these steps carefully to ensure proper installation:
Step 1: Clean the Piston and Ring Grooves
Clean the piston ring and grooves using a groove cleaner or soft brush, while removing all carbon deposits, oil residue, and debris to ensure the rings seat properly.
Step 2: Check and Set the Ring End Gap
Insert each piston ring individually into the cylinder bore and measure the end gap using a feeler gauge. Compare the measurement with the manufacturer’s recommended specifications and file the ring carefully if adjustment is required.
Step 3: Install the Oil Control Ring First(Bottom Ring)
Begin with the oil control ring, which is usually installed in the bottom groove. If it has multiple components, install the expander first, followed by the upper and lower rails without overlapping their ends.
Step 4: Install the Second Compression Ring(Middle Ring)
Next, install the second compression ring. Use a piston ring expander tool to avoid overstretching or breaking the ring.
Step 5: Install the Top Compression Ring(Upper Ring)
Install the top compression ring last. This ring handles the highest pressure and temperature, so handle it carefully.
Step 6: Position the Ring Gaps Properly
Adjust the rings as per the manufacturer’s guidelines. Proper gap positioning prevents blow-by, oil leakage, and loss of compression.
Step 7: Lubricate the Rings and Cylinder Walls
Apply a thin coating of clean engine oil to the rings and cylinder walls to reduce friction during initial startup.
Step 8: Insert the Piston into the Cylinder
Use a piston ring compressor to compress the rings evenly. Gently guide the piston into the cylinder bore, ensuring the connecting rod aligns correctly with the crankshaft.
Step 9: Final Inspection
Once installed, rotate the crankshaft by hand to ensure smooth movement and confirm there is no binding or resistance.
Common Mistakes to Avoid During Piston Ring Installation
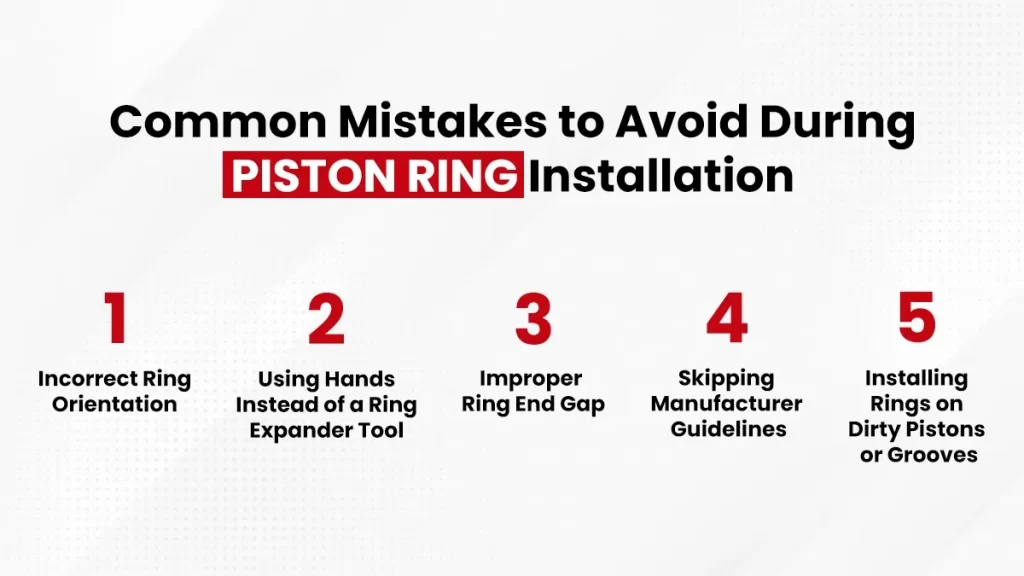
Avoiding these common mistakes is essential to ensure proper sealing, engine efficiency, and long service life:
1. Incorrect Ring Orientation
- Both the Compression ring and Oil ring have their own specific top and bottom sides. Installing them on different sides can lead to poor sealing, increased oil consumption, and reduced engine performance.
2. Using Hands Instead of a Ring Expander Tool
- Using a hand instead of the correct tool can overstretch the ring or even break it.
3. Improper Ring End Gap
- It is important to perfectly adjust the ring end gap can cause serious engine damage. A gap that is too tight may lead to ring breakage due to heat expansion, while a gap that is too wide can cause compression loss and blow-by.
4. Skipping Manufacturer Guidelines
- Each part of an engine has its own guidelines to be followed, and it is the same for the piston ring. Ignoring torque specs, gap settings, or orientation instructions can cause immediate or long-term engine issues.
5. Installing Rings on Dirty Pistons or Grooves
- Carbon buildup, dirt, or sludge in the piston grooves prevents rings from seating properly, leading to uneven wear and early failure.
People Also Read: What causes piston rings to wear out fast?
Signs of Improper Piston Ring Installation
Improper piston ring installation can lead to many serious engine problems if not identified early. Learning about these signs can help prevent long-term damage and costly repairs.
1. Excessive Exhaust Smoke
- If there is blue or grey smoke coming out of the exhaust, it often indicates oil entering the combustion chamber due to incorrectly installed or misaligned piston rings.
2. High Oil Consumption
- If the engine starts consuming more oil than usual without visible leaks, it may be caused by poorly seated rings or incorrect ring gap positioning.
3. Loss of Power and Poor Acceleration
- Due to the leakage of combustion gases, engine power drops. This leads to sluggish acceleration and reduced fuel efficiency.
4. Low Engine Compression
- If the piston rings are not installed properly, it can prevent proper sealing of the combustion chamber, resulting in reduced compression, hard starting, and poor engine performance.
5. Engine Overheating
- If your machine with a piston ring often heats up, it can also indicate damaged piston rings, as increased friction between the piston and cylinder wall leads to overheating and faster wear.
Conclusion: Key Points to Install Piston Rings
From choosing the right tools and conducting thorough pre-installation checks to following a precise, step-by-step installation method, every stage plays a vital role in ensuring effective sealing, controlled oil consumption, and optimal heat transfer. Even small mistakes, such as incorrect ring orientation or improper end gaps, can lead to serious engine issues like power loss, overheating, and excessive oil usage.
By understanding the correct installation process and recognizing early warning signs of improper fitting, you can protect your engine from premature wear and costly repairs. If you need expert guidance, high-quality piston rings, or professional support for your engine application, Kolbenring India is here to help. Fill out the enquiry form on our Contact Us page to connect with our team and get the most reliable piston ring tailored to your engine requirements.
FAQs Related to the Installation Process of Piston Rings
1. How to properly install the piston rings?
Ans: Here is a 5-step process on how to properly install the piston rings: Step 1: Checking Ring End Gap, Step 2: Cleaning the Piston and Grooves, Step 3: Installing Rings Using a Ring Expander, Step 4: Correct Ring Orientation and Gap Positioning, and Step 5: Installing the Piston into the Cylinder Using a Ring Compressor.
2. In what order are piston rings installed?
Ans: Piston rings are installed in the opposite order from bottom to top, bottom being the oil ring and middle and top being the compression rings.
3. What happens if piston rings are installed incorrectly?
Ans: If piston rings are installed incorrectly, then it can cause serious engine issues like power loss, overheating, and excessive oil usage.